Wednesday, January 29, 2020

By Using jQuery,Ajax Bootgrid For An Crud Application In Codeigniter

By Using  jQuery,Ajax Bootgrid For  An Crud Application In Codeigniter

If you want to use Ajax to build a single page CRUD application in Codeigniter, this post is helpful. Because in this article you will learn step by step or from scratch how to use the jQuery Bootgrid plugin in Codeigniter with Ajax. The jQuery Bootgrid plug-in is a compact plug-in, a flexible and powerful grid plug-in for loading dynamic data with Ajax. It's also a very customizable grid control, especially if you've used the bootstrap library. It is mainly used to display dynamic data with Ajax.


This add-on gives you the following benefits:


  • Simple header or footer navigation
  • Table column data is saved
  • Live search or data filtering
  • pagination
  • Client-side processing and server-side data processing

First in our previous publication, in which we already dealt with processing the server-side jQuery boot grid in PHP using Ajax. But here we saw how to integrate the Bootgrid Grid plugin into the Codeigniter framework. Becase Codeigniter is the PHP MVC framework used by many web developers for their web development. If you are a Codeigniter web developer, you should know how to use the Bootgrid plugin with the Codeigniter application. For this we need to do this tutorial. In this post we will deal with Ajax after the CRUD operation with jQuery Bootgrid in Codeigniter.


  • Perform server-side processing and load data into the jQuery boot grid add-in in Codeigniter using Ajax
  • Add or insert data in MySQL in Codeigniter using Ajax with jQuery Bootgrid and Bootstrap Modal
  • Edit or update MySQL data in codeigniter using Ajax with jQuery Bootgrid and Bootstrap Modal
  • Delete or delete MySQL data in codeigniter using Ajax with jQuery Bootgrid and Bootstrap Modal


Bootgrid.php(Controller)


First we have to run Bootgrid.php Controller in the application / controller folder. This class is mainly used to process the http request to insert, update, delete and read data. In this class you will find the following function.


index () - This is the root function for this class. If we have to write the base URL with this class in the browser, this function was called. This function has bootgrid.php load view as output in the browser.


fetch_data (): This function receives the Ajax request from the boot grid plugin to get MySQL data. This function converts the data to matrix format and sends it to the Bootgrid Ajax request in JSON string format.


action () - With this function you can use ajax to insert a MySQL table or add it to the MySQL table. Because this function received an Ajax request to insert data into the mysql table.


fetch_single_data (): This function mainly looks for certain details of employees based on the value of the employee identification. You use this to edit the details of the existing employees.


delete_data (): This function is used to process the AjQ data delete request of the jQuery boot grid plug-in in Codeigniter.


<?php
defined('BASEPATH') OR exit('No direct script access allowed');

class Bootgrid extends CI_Controller {
 
 public function __construct()
 {
  parent::__construct();
  $this->load->model('bootgrid_model');
 }

 function index()
 {
  $this->load->view('bootgrid');
 }

 function fetch_data()
 {
  $data = $this->bootgrid_model->make_query();
  $array = array();
  foreach($data as $row)
  {
   $array[] = $row;
  }
  $output = array(
   'current'  => intval($_POST["current"]),
   'rowCount'  => 10,
   'total'   => intval($this->bootgrid_model->count_all_data()),
   'rows'   => $array
  );
  echo json_encode($output);
 }

 function action()
 {
  if($this->input->post('operation'))
  {
   $data = array(
    'name'   => $this->input->post('name'),
    'address'  => $this->input->post('address'),
    'gender'  => $this->input->post('gender'),
    'designation' => $this->input->post('designation'),
    'age'   => $this->input->post('age')
   );
   if($this->input->post('operation') == 'Add')
   {
    $this->bootgrid_model->insert($data);
    echo 'Data Inserted';
   }
   if($this->input->post('operation') == 'Edit')
   {
    $this->bootgrid_model->update($data, $this->input->post('employee_id'));
    echo 'Data Updated';
   }
  }
 }

 function fetch_single_data()
 {
  if($this->input->post('id'))
  {
   $data = $this->bootgrid_model->fetch_single_data($this->input->post('id'));
   foreach($data as $row)
   {
    $output['name'] = $row['name'];
    $output['address'] = $row['address'];
    $output['gender'] = $row['gender'];
    $output['designation'] = $row['designation'];
    $output['age'] = $row['age'];
   }
   echo json_encode($output);
  }
 }

 function delete_data()
 {
  if($this->input->post('id'))
  {
   $this->bootgrid_model->delete($this->input->post('id'));
   echo 'Data Deleted';
  }
 }
}

?>


Bootgrid_model.php(Models)


We need to run this course in the application / models folder. This type of model is mainly used for all types of database operations. In this class we have the following function to perform operations related to the database.


make_query (): This function is used to search MySQL table data according to the requirements of the boot grid add-in. In this function, we performed the search for selection of search data using the where clause for searching for data, the order_by clause for sorting the data and the limit clause for paging data.


count_all_data (): This function returns the number of rows in the employee table.


insert (): Mainly used for the database insert operation. It performs the insert query, executes the query, and inserts data into the database.


fetch_single_data (): This function selects data from a single employee based on the value of the variable $ id.


update () - This function is used to update or edit the operation of the MySQL database.


delete () - This function causes mysql to delete or delete the data operation in Codeigniter.


application / models / Bootgrid_model.php

<?php
class Bootgrid_model extends CI_Model
{
 var $records_per_page = 10;
 var $start_from = 0;
 var $current_page_number = 1;

 function make_query()
 {
  if(isset($_POST["rowCount"]))
  {
   $this->records_per_page = $_POST["rowCount"];
  }
  else
  {
   $this->records_per_page = 10;
  }
  if(isset($_POST["current"]))
  {
   $this->current_page_number = $_POST["current"];
  }
  $this->start_from = ($this->current_page_number - 1) * $this->records_per_page;
  $this->db->select("*");
  $this->db->from("tbl_employee");
  if(!empty($_POST["searchPhrase"]))
  {
   $this->db->like('name', $_POST["searchPhrase"]);
   $this->db->or_like('address', $_POST["searchPhrase"]);
   $this->db->or_like('gender', $_POST["searchPhrase"]);
   $this->db->or_like('designation', $_POST["searchPhrase"]);
   $this->db->or_like('age', $_POST["searchPhrase"]);
  }
  if(isset($_POST["sort"]) && is_array($_POST["sort"]))
  {
   foreach($_POST["sort"] as $key => $value)
   {
    $this->db->order_by($key, $value);
   }
  }
  else
  {
   $this->db->order_by('id', 'DESC');
  }
  if($this->records_per_page != -1)
  {
   $this->db->limit($this->records_per_page, $this->start_from);
  }
  $query = $this->db->get();
  return $query->result_array();
 }

 function count_all_data()
 {
  $this->db->select("*");
  $this->db->from("tbl_employee");
  $query = $this->db->get();
  return $query->num_rows();
 }

 function insert($data)
 {
  $this->db->insert('tbl_employee', $data);
 }

 function fetch_single_data($id)
 {
  $this->db->where('id', $id);
  $query = $this->db->get('tbl_employee');
  return $query->result_array();
 }

 function update($data, $id)
 {
  $this->db->where('id', $id);
  $this->db->update('tbl_employee', $data);
 }

 function delete($id)
 {
  $this->db->where('id', $id);
  $this->db->delete('tbl_employee');
 }
}

?>


bootgrid.php(Views)


The file under Show Code Signiter is used to display the HTML output on the website. This view file bootgrid.php is located in the applications / views folder. Here we have created an HTML table according to the boot grid plugin, and below is the jQuery code where we initialize the jQuery boot grid plugin with the bootgrid () method. With this method, we enabled the Ajax request to get data and the Edit and Delete button under the Formatter option as well.


<html>
<head>
    <title>By Using  jQuery,Ajax Bootgrid For  An Crud Application In Codeigniter </title>
    
    <link rel="stylesheet" href="https://maxcdn.bootstrapcdn.com/bootstrap/3.3.6/css/bootstrap.min.css" />
    <link rel="stylesheet" href="https://cdnjs.cloudflare.com/ajax/libs/jquery-bootgrid/1.3.1/jquery.bootgrid.css" />
    <script src="https://ajax.googleapis.com/ajax/libs/jquery/2.2.0/jquery.min.js"></script> 
    <script src="https://maxcdn.bootstrapcdn.com/bootstrap/3.3.6/js/bootstrap.min.js"></script>
    <script src="https://cdnjs.cloudflare.com/ajax/libs/jquery-bootgrid/1.3.1/jquery.bootgrid.js"></script>  
</head>
<body>
    <div class="container box">
        <h3 align="center">By Using jQuery,Ajax Bootgrid For  An Crud Application In Codeigniter </h3><br />
        <div class="panel panel-default">
            <div class="panel-heading">
                <div class="row">
                    <div class="col-md-10">
                        <h3 class="panel-title">Employee List</h3>
                    </div>
                    <div class="col-md-2" align="right">
                        <button type="button" id="add_button" data-toggle="modal" data-target="#employeeModal" class="btn btn-info btn-xs">Add</button>
                    </div>
                </div>
                
            </div>
            <div class="panel-body">
                <div class="table-responsive">
                    <table id="employee_data" class="table table-striped table-bordered">
                        <thead>
                            <tr>
                                <th data-column-id="name">Name</th>
                                <th data-column-id="address">Address</th>
                                <th data-column-id="gender">Gender</th>
                                <th data-column-id="designation">Designation</th>
                                <th data-column-id="age">Age</th>
                                <th data-column-id="commands" data-formatter="commands" data-sortable="false">Action</th>
                            </tr>
                        </thead>
                    </table>
                </div>
            </div>
       </div>
    </div>
</body>
</html>

<div id="employeeModal" class="modal fade">
    <div class="modal-dialog">
        <form method="post" id="employee_form">
            <div class="modal-content">
                <div class="modal-header">
                    <button type="button" class="close" data-dismiss="modal">&times;</button>
                    <h4 class="modal-title">Add Employee</h4>
                </div>
                <div class="modal-body">
                    <div class="form-group">
                        <label>Enter Name</label>
                        <input type="text" name="name" id="name" class="form-control" />
                    </div>
                    <div class="form-group">
                        <label>Enter Address</label>
                        <textarea name="address" id="address" class="form-control"></textarea>
                    </div>
                    <div class="form-group">
                        <label>Select Gender</label>
                        <select name="gender" id="gender" class="form-control">
                            <option value="Male">Male</option>
                            <option value="Female">Female</option>
                        </select>
                    </div>
                    <div class="form-group">
                        <label>Enter Designation</label>
                        <input type="text" name="designation" id="designation" class="form-control" />
                    </div>
                    <div class="form-group">
                        <label>Enter Age</label>
                        <input type="text" name="age" id="age" class="form-control" />
                    </div>
                </div>
                <div class="modal-footer">
                    <input type="hidden" name="employee_id" id="employee_id" />
                    <input type="hidden" name="operation" id="operation" value="Add" />
                    <input type="submit" name="action" id="action" class="btn btn-success" value="Add" />
                </div>
            </div>
        </form>
    </div>
</div>

<script type="text/javascript" language="javascript" >
$(document).ready(function(){
    
    var employeeTable = $('#employee_data').bootgrid({
        ajax:true,
        rowSelect: true,
        post:function()
        {
            return{
                id:"b0df282a-0d67-40e5-8558-c9e93b7befed"
            }
        },
        url:"<?php echo base_url(); ?>bootgrid/fetch_data",
        formatters:{
            "commands":function(column, row)
            {
                return "<button type='button' class='btn btn-warning btn-xs update' data-row-id='"+row.id+"'>Edit</button>" + "&nbsp; <button type='button' class='btn btn-danger btn-xs delete' data-row-id='"+row.id+"'>Delete</button>";
            }
        }
    });

    $('#add_button').click(function(){
        $('#employee_form')[0].reset();
        $('.modal-title').text("Add Employee");
        $('#action').val("Add");
        $('#operation').val("Add");
    });

    $(document).on('submit', '#employee_form', function(event){
        event.preventDefault();
        var name = $('#name').val();
        var address = $('#address').val();
        var gender = $('#gender').val();
        var designation = $('#designation').val();
        var age = $('#age').val();
        var form_data = $(this).serialize();
        if(name != '' && address != '' &&  gender != '' &&  designation != '' && age != '')
        {
            $.ajax({
                url:"<?php echo base_url(); ?>bootgrid/action",
                method:"POST",
                data:form_data,
                success:function(data)
                {
                    alert(data);
                    $('#employee_form')[0].reset();
                    $('#employeeModal').modal('hide');
                    $('#employee_data').bootgrid('reload');
                }
            });
        }
        else
        {
            alert("All Fields are Required");
        }
    });

    $(document).on("loaded.rs.jquery.bootgrid", function(){
        employeeTable.find('.update').on('click', function(event){
            var id = $(this).data('row-id');
            $.ajax({
                url:"<?php echo base_url(); ?>bootgrid/fetch_single_data",
                method:"POST",
                data:{id:id},
                dataType:"json",
                success:function(data)
                {
                    $('#employeeModal').modal('show');
                    $('#name').val(data.name);
                    $('#address').val(data.address);
                    $('#gender').val(data.gender);
                    $('#designation').val(data.designation);
                    $('#age').val(data.age);
                    $('.modal-title').text("Edit Employee Details");
                    $('#employee_id').val(id);
                    $('#action').val('Edit');
                    $('#operation').val('Edit');
                }
            });
        });

        employeeTable.find('.delete').on('click', function(event){
            if(confirm("Are you sure you want to delete this?"))
            {
                var id = $(this).data('row-id');
                $.ajax({
                    url:"<?php echo base_url(); ?>bootgrid/delete_data",
                    method:"POST",
                    data:{id:id},
                    success:function(data)
                    {
                        alert(data);
                        $('#employee_data').bootgrid('reload');
                    }
                });
            }
            else
            {
                return false;
            }
        });
    });
    
});
</script>


With the help of this publication, you create the one-sided application Codeigniter Ajax with the plugin jQuery Bootgrid.

How To Export Mysql Data to CSV File In Codeigniter

How To  Export Mysql Data to CSV File In Codeigniter

If you are looking for a web tutorial on exporting MySQL data to a CSV file in Codeignier. To get you in the right place, we covered topics in this publication such as exporting MySQL data to a CSV file under Codeigniter. Everyone knows that the Codeigniter framework is used to drive coding and build a faster web-based application. Once the application runs perfectly and its final use is complete, your web application contains a lot of data. Then you have saved it in a readable file format at this point. At this point you need to export your web application data in CSV file format (comma separated values). Because the data in this file format is often used to import and export data in web-based applications. The CSV file format is very simple for storing data in the extended format.

Now the question arises: How can I export MySQL data to a CSV file and download data to a CSV file from the live application in Codeigniter? First of all, we have already published a tutorial on importing data from a CSV file under Codeigniter. This article will now explain how data from the MySQL database can be exported to a CSV file using code signiter. Here you will also learn how to create a CSV file in Codeigniter and download it to a local computer or save MySQL data in a CSV file in Codeigniter.


In order to describe the export of Mysql data to the CSV file function, we have created a script in the Codeigniter MVC framework in which you export student data from the Mysql database table and insert it into the CSV file with Codeigniter.


Make Table in Mysql Database


The following script creates the student table in your MySQL database. You need to run the tracking script on your PHPMyAdmin.


--
-- Database: `testing`
--

-- --------------------------------------------------------

--
-- Table structure for table `tbl_student`
--

CREATE TABLE `tbl_student` (
  `student_id` int(11) NOT NULL,
  `student_name` varchar(250) NOT NULL,
  `student_phone` varchar(20) NOT NULL,
  `image` varchar(255) NOT NULL
) ENGINE=MyISAM DEFAULT CHARSET=latin1;

--
-- Indexes for table `tbl_student`
--
ALTER TABLE `tbl_student`
  ADD PRIMARY KEY (`student_id`);

--
-- AUTO_INCREMENT for dumped tables
--

--
-- AUTO_INCREMENT for table `tbl_student`
--
ALTER TABLE `tbl_student`
  MODIFY `student_id` int(11) NOT NULL AUTO_INCREMENT, AUTO_INCREMENT=1;


Create Database Connection


Once the student table is ready, you need to establish the database connection in Codeigniter. For the database connection in Codeigniter you have to go to application / config / database.php. In this file you have to establish the database connection in Codeigniter.

application/config/database.php

<?php

$active_group = 'default';
$query_builder = TRUE;

$db['default'] = array(
 'dsn' => '',
 'hostname' => 'localhost',
 'username' => 'root',
 'password' => '',
 'database' => 'testing',
 'dbdriver' => 'mysqli',
 'dbprefix' => '',
 'pconnect' => FALSE,
 'db_debug' => (ENVIRONMENT !== 'production'),
 'cache_on' => FALSE,
 'cachedir' => '',
 'char_set' => 'utf8',
 'dbcollat' => 'utf8_general_ci',
 'swap_pre' => '',
 'encrypt' => FALSE,
 'compress' => FALSE,
 'stricton' => FALSE,
 'failover' => array(),
 'save_queries' => TRUE
);

?>


Export_csv.php (Controllers)


After establishing the connection to the database you have to create the file Export_csv.php in the folder application / controller. Driver files used primarily to process the application's HTTP request. In this file we have to do the following method.

index () - This method is a root method of this class. This method receives data from the model student and sends data to view the file. export (): This method receives a form submission request to export MySQL data to a CSV file. This function writes MySQL data into a CSV file and after sending the file for download.


application/controllers/Export_csv.php

<?php if ( ! defined('BASEPATH')) exit('No direct script access allowed');

class Export_csv extends CI_Controller {
 
 public function __construct()
 {
  parent::__construct();
  $this->load->model('export_csv_model');
 }

 function index()
 {
  $data['student_data'] = $this->export_csv_model->fetch_data();
  $this->load->view('export_csv', $data);
 }

 function export()
 {
  $file_name = 'student_details_on_'.date('Ymd').'.csv'; 
     header("Content-Description: File Transfer"); 
     header("Content-Disposition: attachment; filename=$file_name"); 
     header("Content-Type: application/csv;");
   
     // get data 
     $student_data = $this->export_csv_model->fetch_data();

     // file creation 
     $file = fopen('php://output', 'w');
 
     $header = array("Student Name","Student Phone"); 
     fputcsv($file, $header);
     foreach ($student_data->result_array() as $key => $value)
     { 
       fputcsv($file, $value); 
     }
     fclose($file); 
     exit; 
 }
 
  
}


Export_csv_model.php (Models)


Models of codeigniter files used primarily for database operations. You need to create the model file in the application / models folder. There is only one method in this file that we created. Here the method fetch_data () is used to get data from the student table.


<?php
class Export_csv_model extends CI_Model
{
 function fetch_data()
 {
  $this->db->select("student_name, student_phone");
  $this->db->from('tbl_student');
  return $this->db->get();
 }
}

?>


export_csv.php (Views)


This view file is used to display results in HTML format on the website. This file must be created in the applications / views folder. This file first received the student data from the controllers. Click the "Export" button when in use, and then you will be prompted to export data to CSV to export the data to the CSV file.


<html>
<head>
    <title>How To  Export Mysql Data to CSV File In Codeigniter</title>
    
 <script src="https://ajax.googleapis.com/ajax/libs/jquery/2.2.0/jquery.min.js"></script>
 <link rel="stylesheet" href="https://maxcdn.bootstrapcdn.com/bootstrap/3.3.6/css/bootstrap.min.css" />
 <script src="https://maxcdn.bootstrapcdn.com/bootstrap/3.3.6/js/bootstrap.min.js"></script>
    
</head>
<body>
 <div class="container box">
  <h3 align="center">How To  Export Mysql Data to CSV File In Codeigniter</h3>
  <br />
  <form method="post" action="<?php echo base_url(); ?>export_csv/export">
   <div class="panel panel-default">
    <div class="panel-heading">
     <div class="row">
      <div class="col-md-6">
       <h3 class="panel-title">Student Data</h3>
      </div>
      <div class="col-md-6" align="right">
       <input type="submit" name="export" class="btn btn-success btn-xs" value="Export to CSV" />
      </div>
     </div>
    </div>
    <div class="panel-body">
     <div class="table-responsive">
      <table class="table table-bordered table-striped">
       <tr>
        <th>Student Name</th>
        <th>Student Phone</th>
       </tr>
       <?php
       foreach($student_data->result_array() as $row)
       {
        echo '
        <tr>
         <td>'.$row["student_name"].'</td>
         <td>'.$row["student_phone"].'</td>
        </tr>
        ';
       }
       ?>
      </table>
     </div>
    </div>
   </div>
  </form>
 </div>
</body>
</html>

In this tutorial, you will learn how to export MySQL data in Codeigniter to the CSV file format.

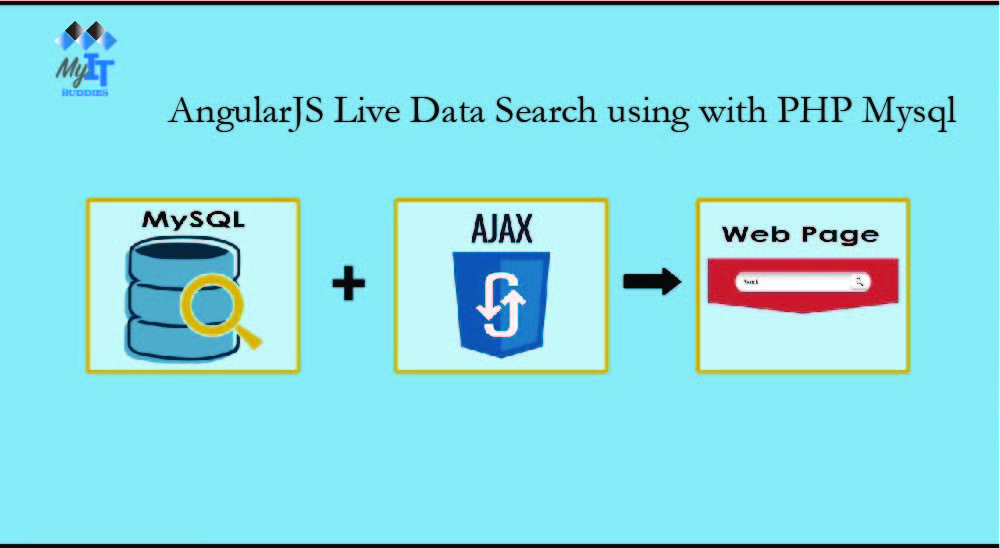
AngularJS Live Data Search using with PHP Mysql

AngularJS Live Data Search using with PHP Mysql

If you want to run the Mysql Live data search function in AngularJS with PHP, this publication provides step-by-step instructions for using AngularJS with PHP to implement the mysql Live data search function. Searching for live data means that you can search for MySQL table data by typing your search query in the text box. Based on this search script, you search for data in the MySQL table in all columns, and filter the data from the table and display it on the Web without refreshing the page. Because here we used AngularJS to create live data search functions.

If you used the MySQL database to store records and retrieved records from the MySQL table and display them in the HTML table on the website. Now you want to search for data from a large amount of data and display the filter result on the website. If you have implemented the live data search function in your application at this point, this will reduce your search effort. It shows live data on the website when you start typing in the text box, and filters the data based on what you wrote into the text box based on your text.

In some of our previous web tutorials, we've already published Live Data Search that uses Ajax JQuery, Codeigniter, and even Laravel Framework. However, we have not yet created a tutorial on how to find live data with AngularJS. Many web developers have used AngularJS as a front end instead of jQuery. If you're a beginner to AngularJS developers, you've used PHP as the backend. In this post, you will learn how to build a live database search application in AngularJS using PHP.


Source Code


Create Database


Run the following script in your PHPMyAdmin. It creates a table with clients in your database.


--
-- Database: `testing`
--

-- --------------------------------------------------------

--
-- Table structure for table `tbl_customer`
--

CREATE TABLE `tbl_customer` (
  `CustomerID` int(11) NOT NULL,
  `CustomerName` varchar(250) NOT NULL,
  `Gender` varchar(30) NOT NULL,
  `Address` text NOT NULL,
  `City` varchar(250) NOT NULL,
  `PostalCode` varchar(30) NOT NULL,
  `Country` varchar(100) NOT NULL
) ENGINE=MyISAM DEFAULT CHARSET=latin1;

--
-- Dumping data for table `tbl_customer`
--

INSERT INTO `tbl_customer` (`CustomerID`, `CustomerName`, `Gender`, `Address`, `City`, `PostalCode`, `Country`) VALUES
(1, 'Maria Anders', 'Female', 'Obere Str. 57', 'Berlin', '12209', 'Germany'),
(2, 'Ana Trujillo', 'Female', 'Avda. de la Construction 2222', 'Mexico D.F.', '5021', 'Mexico'),
(3, 'Antonio Moreno', 'Male', 'Mataderos 2312', 'Mexico D.F.', '5023', 'Mexico'),
(4, 'Thomas Hardy', 'Male', '120 Hanover Sq.', 'London', 'WA1 1DP', 'United Kingdom'),
(5, 'Paula Parente', 'Female', 'Rua do Mercado, 12', 'Resende', '08737-363', 'Brazil'),
(6, 'Wolski Zbyszek', 'Male', 'ul. Filtrowa 68', 'Walla', '01-012', 'Poland'),
(7, 'Matti Karttunen', 'Male', 'Keskuskatu 45', 'Helsinki', '21240', 'Finland'),
(8, 'Karl Jablonski', 'Male', '305 - 14th Ave. S. Suite 3B', 'Seattle', '98128', 'United States'),
(9, 'Paula Parente', 'Female', 'Rua do Mercado, 12', 'Resende', '08737-363', 'Brazil'),
(10, 'John Koskitalo', 'Male', 'Torikatu 38', 'Oulu', '90110', 'Finland'),
(39, 'Ann Devon', 'Female', '35 King George', 'London', 'WX3 6FW', 'United Kingdom'),
(38, 'Janine Labrune', 'Female', '67, rue des Cinquante Otages', 'Nantes', '44000', 'Finland'),
(37, 'Kathryn Segal', 'Female', 'Augsburger Strabe 40', 'Ludenscheid Gevelndorf', '58513', 'Germany'),
(36, 'Elizabeth Brown', 'Female', 'Berkeley Gardens 12 Brewery', 'London', 'WX1 6LT', 'United Kingdom'),
(30, 'Trina Davidson', 'Female', '1049 Lockhart Drive', 'Barrie', 'ON L4M 3B1', 'Canada'),
(31, 'Jeff Putnam', 'Male', 'Industrieweg 56', 'Bouvignies', '7803', 'Belgium'),
(32, 'Joyce Rosenberry', 'Female', 'Norra Esplanaden 56', 'HELSINKI', '380', 'Finland'),
(33, 'Ronald Bowne', 'Male', '2343 Shadowmar Drive', 'New Orleans', '70112', 'United States'),
(34, 'Justin Adams', 'Male', '45, rue de Lille', 'ARMENTIERES', '59280', 'France'),
(35, 'Pedro Afonso', 'Male', 'Av. dos Lusiadas, 23', 'Sao Paulo', '05432-043', 'Brazil'),
(100, 'Kathryn Segal', 'Female', 'Augsburger Strabe 40', 'Ludenscheid Gevelndorf', '58513', 'Germany'),
(101, 'Tonia Sayre', 'Female', '84 Haslemere Road', 'ECHT', 'AB32 2DY', 'United Kingdom'),
(102, 'Loretta Harris', 'Female', 'Avenida Boavista 71', 'SANTO AMARO', '4920-111', 'Portugal'),
(103, 'Sean Wong', 'Male', 'Rua Vito Bovino, 240', 'Sao Paulo-SP', '04677-002', 'Brazil'),
(104, 'Frederick Sears', 'Male', 'ul. Marysiuska 64', 'Warszawa', '04-617', 'Poland'),
(105, 'Tammy Cantrell', 'Female', 'Lukiokatu 34', 'HAMEENLINNA', '13250', 'Finland'),
(106, 'Megan Kennedy', 'Female', '1210 Post Farm Road', 'Norcross', '30071', 'United States'),
(107, 'Maria Whittaker', 'Female', 'Spresstrasse 62', 'Bielefeld Milse', '33729', 'Germany'),
(108, 'Dorothy Parker', 'Female', '32 Lairg Road', 'NEWCHURCH', 'HR5 5DR', 'United Kingdom'),
(109, 'Roger Rudolph', 'Male', 'Avenida Julio Saul Dias 78', 'PENAFIEL', '4560-470', 'Portugal'),
(110, 'Karen Metivier', 'Female', 'Rua Guimaraes Passos, 556', 'Sao Luis-MA', '65025-450', 'Brazil'),
(111, 'Charles Hoover', 'Male', 'Al. Tysiaclecia 98', 'Warszawa', '03-851', 'Poland'),
(112, 'Becky Moss', 'Female', 'Laivurinkatu 6', 'MIKKELI', '50120', 'Finland'),
(113, 'Frank Kidd', 'Male', '2491 Carson Street', 'Cincinnati', 'KY 45202', 'United States'),
(114, 'Donna Wilson', 'Female', 'Hallesches Ufer 69', 'Dettingen', '73265', 'Germany'),
(115, 'Lillian Roberson', 'Female', '36 Iolaire Road', 'NEW BARN', 'DA3 3FT', 'United Kingdom');

--
-- Indexes for dumped tables
--

--
-- Indexes for table `tbl_customer`
--
ALTER TABLE `tbl_customer`
  ADD PRIMARY KEY (`CustomerID`);

--
-- AUTO_INCREMENT for dumped tables
--

--
-- AUTO_INCREMENT for table `tbl_customer`
--
ALTER TABLE `tbl_customer`
  MODIFY `CustomerID` int(11) NOT NULL AUTO_INCREMENT, AUTO_INCREMENT=116;


index.php


This file contains the front-end HTML code and the AngularJS code for performing live data searches.


<?php

//index.php

?>
<!DOCTYPE html>
<html>
 <head>
  <title>AngularJS Live Data Search using with PHP Mysql</title>
  <link href="https://maxcdn.bootstrapcdn.com/bootstrap/3.3.7/css/bootstrap.min.css" rel="stylesheet">
  <script src="http://ajax.googleapis.com/ajax/libs/angularjs/1.5.7/angular.min.js"></script>
  <style>
  .form_style
  {
   width: 600px;
   margin: 0 auto;
  }
  </style>
 </head>
 <body>
  
  <div class="container" ng-app="live_search_app" ng-controller="live_search_controller" ng-init="fetchData()">
   <br />
   <h3 align="center">AngularJS Live Data Search using with PHP Mysql</h3>
   <br />
   <div class="form-group">
    <div class="input-group">
     <span class="input-group-addon">Search</span>
     <input type="text" name="search_query" ng-model="search_query" ng-keyup="fetchData()" placeholder="Search by Customer Details" class="form-control" />
    </div>
   </div>
   <br />
   <table class="table table-striped table-bordered">
    <thead>
     <tr>
      <th>Customer Name</th>
      <th>Gender</th>
      <th>Address</th>
      <th>City</th>
      <th>Postal Code</th>
      <th>Country</th>
     </tr>
    </thead>
    <tbody>
     <tr ng-repeat="data in searchData">
      <td>{{ data.CustomerName }}</td>
      <td>{{ data.Gender }}</td>
      <td>{{ data.Address }}</td>
      <td>{{ data.City }}</td>
      <td>{{ data.PostalCode }}</td>
      <td>{{ data.Country }}</td>
     </tr>
    </tbody>
   </table>
  </div>
  
 </body>
</html>

<script>
var app = angular.module('live_search_app', []);
app.controller('live_search_controller', function($scope, $http){
 $scope.fetchData = function(){
  $http({
   method:"POST",
   url:"fetch.php",
   data:{search_query:$scope.search_query}
  }).success(function(data){
   $scope.searchData = data;
  });
 };
});
</script>


fetch.php


In this PHP file you will find a PHP script for searching or filtering data in the MySQL table or all data in the MySQL table. This script received Ajax's request to search for data and send data in json format.


<?php

//fetch.php


$connect = new PDO("mysql:host=localhost;dbname=testing", "root", "");

$form_data = json_decode(file_get_contents("php://input"));

$query = '';
$data = array();

if(isset($form_data->search_query))
{
 $search_query = $form_data->search_query;
 $query = "
 SELECT * FROM tbl_customer 
 WHERE (CustomerName LIKE '%$search_query%' 
 OR Address LIKE '%$search_query%' 
 OR City LIKE '%$search_query%' 
 OR PostalCode LIKE '%$search_query%' 
 OR Country LIKE '%$search_query%') 
 OR Gender = '$search_query'
 ";
}
else
{
 $query = "SELECT * FROM tbl_customer ORDER BY CustomerName ASC";
}

$statement = $connect->prepare($query);

if($statement->execute())
{
 while($row = $statement->fetch(PDO::FETCH_ASSOC))
 {
  $data[] = $row;
 }
 echo json_encode($data);
}

?>


This is the complete source for AngularJS Live data search using PHP and MySQL. If you have any questions about this publication, you can comment them in the comment field.