Showing posts with label mysql. Show all posts

Monday, February 10, 2020

MongoDB vs MySQL Comparison: Which Database Is Better?

MongoDB  vs  MySQL Comparison: Which Database Is Better?

Nowadays, in times of technology, new companies and companies are thinking about storing and managing data better to get a great customer perspective. And we can also meet new user expectations or beat the competitive market with new business models and applications.

Considering the best DBMS is always a difficult task in this technological world, as there are many options to choose from. DBMS is divided into two types: relational and non-relational. In recent years, the use of MySQL has increased significantly in relational database systems such as PostgreSQL.

On the other hand, not relational database management systems like MongoDB. These can store and manage large amounts of data.

Let us discuss which DBMS is better suited considering relational and non-relational DBMS, namely MongoDB and MySQL.

So let's take a closer look at comparing MongoDB and MySQL

What is MySQL?


MySQL is an advanced relational open source DBMS. It is developed, supported and distributed by Oracle. MySQL stores and manages data using tables and structured query language (SQL) to access the database. The SQL language is used on a server called SQL Server Databases.

Use simple commands such as "INSERT", "DELETE", "UPDATE", "SELECT" to access and manage data. With MySQL, you can predefine the database schema based on your configuration and requirements to monitor the connections between fields and tables.

What is MongoDB?


MongoDB is popularly known as a non-relational database system. In MongoDB, the data is saved in the form of a document format in a binary representation model called BSON. Related information is stored collectively by MongoDB for quick access to queries.
In MongoDB, a document is called a large JSON object. It does not contain a specific scheme or format. For each type of query access, associated data is saved in the query language MongoDB. This process is different for different field types.

If a new field type has to be combined with a document, the field can be generated without having to change all other documents in the entry process, without having to separate the system and update a catalog of the central system. Essentially, schema validation is used to support data governance handlers for each collection.

Data Structure and Storage


As we know, MySQL follows the relational model database system. In what data are stored in the form of tables. Together with you, you have to predefine the schema, depending on the requirements between fields and tables.

In MongoDB, on the other hand, the data is saved in the form of documents in a capture format. This big difference is great support for developers. Define the schema based on the code and there is no need to continue the schema migrations in the future.

Concepts and Terminology Comparison


Many terms in MongoDB have close analogies in MySQL. The following table describes the general connections between MongoDB and MySQL.


MongoDB                                               MySQL

Collection                                                                           Table
Field                                                                                     Column
Aggregation Pipeline                                                        Group_BY
Secondary Index                                                                 Secondary Index
ACID Transactions                                                             ACID Transactions


Syntax Comparison and Query Language


The query languages MongoDB and MySQL are strong. An unstructured query language used by MongoDB. And documents that are saved in the form of large JSON file formats. At the time of running MongoDB, various types of operators are used that are similar to the JSON document file. MongoDB supports Boolean queries.

On the other hand, MySQL works with the structured query language when accessing the database. Maybe it's easy. This language is very strong and consists of two parts.

DDL (data definition language)
DML (data processing language)

Select records from the required table for the example:


MySQL:


SELECT * FROM table_name


MongoDB:


db.table_name.find()


Insert records into the required table and it is mentioned below:


MySQL:


INSERT INTO table_name (cust_id, branch, status) VALUES ('app1', 'sub', 'C')

MongoDB:


$db.table_name.insert({ cust_id: 'app1', branch: 'sub', status: 'C'})


Some of the concepts are mentioned below.

SQL Concepts                               MongoDB Concepts

SELECT                                                                   $project
LIMIT                                                                      $limit
join                                                                          $lookup
ORDER BY                                                              $sort
COUNT                                                                    $sum


Speed and Performance


In MySQL, data is spread across multiple tables, so multiple tables must be able to write and read data at the same time. While in MongoDB all documents are stored in a single entity called a JSON file, this is the reason why access to data is very fast. This means that all data is written and read in a single property document. Although MySQL is compatible with JSON, you may not get the same benefits that MongoDB offers.

MySQL is slow compared to MongoDB because it uses large amounts of data. If the volume of data is larger, it cannot deal with unstructured language.


Developer Productivity


Die Erstellung von Anwendungen in MySQL ist ein langsamer Prozess, da das strukturierte Modell starrer Tabellen verwendet wird. Im gleichen Fall hat das Arbeiten mit JSON-Dokumenten in MongoDB große Entwicklungszyklen, die bis zu friday fünfmal dauern. MongoDB-Dokumente werden direkt Oops zugewiesen, sodass Entwickler leichter sehen und verstehen können, wie Anwendungsdaten in die Datenbank eingefügt werden.


Security Model


MongoDB can create its control with a number of variable requirements. It contains important security functions such as verification, authorization and authentication etc. SSL (Secure Sockets Layer) and TLS (Transport Layer Security) are also supported for encryption of the server endpoint. This ensures that the only customer required to encrypt can choose to access the documents.


As Business Application When MongoDB used


  1. Require cloud-based services
  2. You need to reduce the cost of schema migration
  3. The requirement of the database administrator is less
  4. Shading solutions are required.


Adobe, Electronic Arts, Ebay, Cisco, Google, Facebook etc. These are the big companies that use MongoDB as the programming language for databases.


As Business Application When MySQL used


  1. Very small budget
  2. Fixed schema for databases
  3. Privacy priority
  4. Request high transaction rates


NASA, U.S. Navy, YouTube, Netflix, Spotify, Uber, Bank of America, etc. These are the big companies around the world that use MySQL as the programming language for databases.


Conclusion


MongoDB and MySQL have their weaknesses and strengths. If you need data to support older applications or multi-line transactions, the relational database is the right choice for your company or company. If you need more flexibility and schema-free options, both of them may be able to work with unstructured data. In this case, MongoDB is the best and best option. MongoDB is also known as a NoSQL database. This database is more unusual and is suitable for processing further data.


Author Bio


Anjaneyulu Naini loves writing excellence and is passionate about technology. He believes that a skill or talent is worth more than just a degree. He currently works as a content writer on MindMajix.com.


Thursday, February 6, 2020

Ajax AutoComplete Textbox With Image Using jQuery UI in PHP

Ajax AutoComplete Textbox With Image Using  jQuery UI  in PHP

If you are using PHP as web development and have created a PHP-based website, you need a search function on your website. If you have then added the search list for automatic completion in this "Search" text box and have another function such as displaying images with this automatic search list. For this reason, you are adding advanced features to your website's user interface.

Most websites generally displayed a text box with a name, email address, or plain text. However, there are only a few websites on which the previously completed search result contains a display image. Here we create a text box for autocomplete that creates a list of search results that have previously been populated with images. To do this, we add a custom HTML tag to the jQuery UI auto-completion method by adding _renderItem. Here we use the __renderItem method. With this method, we paste custom HTML into the autocomplete text box.

Using the jQery user interface, we can easily implement the autocomplete widget for all input text fields. This autocomplete widget offers us many customization options that meet our needs. So here we have to display the image with the search result. Therefore, this _renderItem method is provided, which allows us to define a custom HTML code to display the image in the search list for automatic suggestions.


This add-in for the automatic completion of the jQuery user interface can be very easily integrated into our existing code. With the simple autocomplete () method, we can initialize this add-in in any defined input text field element. This add-on used the Ajax request to get data from the PHP script. We have to define the name of the PHP file in the source option. If you send an Ajax request to a PHP script and receive a response from the PHP script in JSON format, the search result on the website is automatically suggested without the website being updated. Therefore, this autocomplete widget provides automatic suggestions as a search result that the user can see under the autocomplete text box while searching for a value in the text box element. You can then complete the source with the online demo link.


Database


--
-- Database: `testing`
--

-- --------------------------------------------------------

--
-- Table structure for table `tbl_student`
--

CREATE TABLE `tbl_student` (
  `student_id` int(11) NOT NULL,
  `student_name` varchar(250) NOT NULL,
  `student_phone` varchar(20) NOT NULL,
  `image` varchar(255) NOT NULL
) ENGINE=MyISAM DEFAULT CHARSET=latin1;

--
-- Dumping data for table `tbl_student`
--

INSERT INTO `tbl_student` (`student_id`, `student_name`, `student_phone`, `image`) VALUES
(1, 'Pauline S. Rich', '412-735-0224', 'image_1.jpg'),
(2, 'Sarah C. White', '320-552-9961', 'image_2.jpg'),
(3, 'Samuel L. Leslie', '201-324-8264', 'image_3.jpg'),
(4, 'Norma R. Manly', '478-322-4715', 'image_4.jpg'),
(5, 'Kimberly R. Castro', '479-966-6788', 'image_5.jpg'),
(6, 'Elaine R. Davis', '701-685-8912', 'image_6.jpg'),
(7, 'Concepcion S. Gardner', '607-829-8758', 'image_7.jpg'),
(8, 'Patricia J. White', '803-789-0429', 'image_8.jpg'),
(9, 'Michael M. Bothwell', '214-585-0737', 'image_9.jpg'),
(10, 'Ronald C. Vansickle', '630-571-4107', 'image_10.jpg'),
(11, 'Clarence A. Rich', '904-459-3747', 'image_11.jpg'),
(12, 'Elizabeth W. Peterson', '404-380-9481', 'image_12.jpg'),
(13, 'Renee R. Hewitt', '323-350-4973', 'image_13.jpg'),
(14, 'John K. Love', '337-229-1983', 'image_14.jpg'),
(15, 'Teresa J. Rincon', '216-394-6894', 'image_15.jpg'),
(16, 'Erin S. Huckaby', '503-284-8652', 'image_16.jpg'),
(17, 'Brian A. Handley', '989-304-7122', 'image_17.jpg'),
(18, 'Michelle A. Polk', '540-232-0351', 'image_18.jpg'),
(19, 'Wanda M. Brown', '718-262-7466', 'image_19.jpg'),
(20, 'Phillip A. Hatcher', '407-492-5727', 'image_20.jpg'),
(21, 'Dennis J. Terrell', '903-863-5810', 'image_21.jpg'),
(22, 'Britney F. Johnson', '972-421-6933', 'image_22.jpg'),
(23, 'Rachelle J. Martin', '920-397-4224', 'image_23.jpg'),
(24, 'Leila E. Ledoux', '615-425-9930', 'image_24.jpg'),
(25, 'Darrell A. Fields', '708-887-1913', 'image_25.jpg'),
(26, 'Linda D. Carter', '909-386-7998', 'image_26.jpg'),
(27, 'Melva J. Palmisano', '630-643-8763', 'image_27.jpg'),
(28, 'Jessica V. Windham', '513-807-9224', 'image_28.jpg'),
(29, 'Karen T. Martin', '847-385-1621', 'image_29.jpg'),
(30, 'Jack K. McDonough', '561-641-4509', 'image_30.jpg'),
(31, 'John M. Williams', '508-269-9346', 'image_31.jpg'),
(32, 'Amelia W. Davis', '347-537-8052', 'image_32.jpg'),
(33, 'Gertrude W. Lawrence', '510-702-7415', 'image_33.jpg'),
(34, 'Michael L. Harris', '252-219-4076', 'image_34.jpg'),
(35, 'Casey A. Groves', '810-334-9674', 'image_35.jpg'),
(36, 'James H. Wilson', '865-259-6772', 'image_36.jpg'),
(37, 'James A. Wesley', '443-217-1859', 'image_37.jpg'),
(38, 'Armando C. Gay', '716-252-9230', 'image_38.jpg'),
(39, 'James M. Duarte', '402-840-0541', 'image_39.jpg'),
(40, 'Jason E. West', '360-610-7730', 'image_40.jpg'),
(41, 'Gloria H. Saucedo', '205-861-3306', 'image_41.jpg'),
(42, 'Paul T. Moody', '914-683-4994', 'image_42.jpg'),
(43, 'Sandra L. Williams', '310-335-1336', 'image_43.jpg'),
(44, 'Elaine T. Deville', '626-513-8306', 'image_44.jpg'),
(45, 'Robyn L. Spangler', '754-224-7023', 'image_45.jpg'),
(46, 'Sam A. Pino', '806-823-5344', 'image_46.jpg'),
(47, 'Joseph H. Marble', '201-917-2804', 'image_47.jpg'),
(48, 'Mark M. Bassett', '206-592-4665', 'image_48.jpg'),
(49, 'Edgar M. Billy', '978-365-0324', 'image_49.jpg'),
(50, 'Connie M. Yang', '815-288-5435', 'image_50.jpg');

--
-- Indexes for dumped tables
--

--
-- Indexes for table `tbl_student`
--
ALTER TABLE `tbl_student`
  ADD PRIMARY KEY (`student_id`);

--
-- AUTO_INCREMENT for dumped tables
--

--
-- AUTO_INCREMENT for table `tbl_student`
--
ALTER TABLE `tbl_student`
  MODIFY `student_id` int(11) NOT NULL AUTO_INCREMENT, AUTO_INCREMENT=71;


index.php


<!DOCTYPE html>
<html>
  <head>
    <title>Ajax AutoComplete Textbox With Image Using  jQuery UI  in PHP</title>
    <script src="https://ajax.googleapis.com/ajax/libs/jquery/3.1.0/jquery.min.js"></script>
    <script src="https://cdnjs.cloudflare.com/ajax/libs/jqueryui/1.12.1/jquery-ui.js"></script>
    <link rel="stylesheet" href="https://cdnjs.cloudflare.com/ajax/libs/jqueryui/1.12.1/jquery-ui.css" />
    <link rel="stylesheet" href="https://maxcdn.bootstrapcdn.com/bootstrap/3.3.6/css/bootstrap.min.css" />
    <script src="https://maxcdn.bootstrapcdn.com/bootstrap/3.3.7/js/bootstrap.min.js"></script>

    <style type="text/css">
      .ui-autocomplete-row
      {
        padding:8px;
        background-color: #f4f4f4;
        border-bottom:1px solid #ccc;
        font-weight:bold;
      }
      .ui-autocomplete-row:hover
      {
        background-color: #ddd;
      }
    </style>
  </head>
  <body>
    <br />
    <br />
    <div class="container">
      <h3 align="center">Ajax AutoComplete Textbox With Image Using  jQuery UI  in PHP</h3>
      <br />
      <br />
      <br />
      <div class="row">
        <div class="col-md-3">

        </div>
        <div class="col-md-6">
          <input type="text" id="search_data" placeholder="Enter Student name..." autocomplete="off" class="form-control input-lg" />
        </div>
        <div class="col-md-3">

        </div>
      </div>
    </div>
  </body>
</html>
<script>
  $(document).ready(function(){
      
    $('#search_data').autocomplete({
      source: "fetch.php",
      minLength: 1,
      select: function(event, ui)
      {
        $('#search_data').val(ui.item.value);
      }
    }).data('ui-autocomplete')._renderItem = function(ul, item){
      return $("<li class='ui-autocomplete-row'></li>")
        .data("item.autocomplete", item)
        .append(item.label)
        .appendTo(ul);
    };

  });
</script>


fetch.php


<?php

//fetch.php;

if(isset($_GET["term"]))
{
 $connect = new PDO("mysql:host=localhost; dbname=testing", "root", "");

 $query = "
 SELECT * FROM tbl_student 
 WHERE student_name LIKE '%".$_GET["term"]."%' 
 ORDER BY student_name ASC
 ";

 $statement = $connect->prepare($query);

 $statement->execute();

 $result = $statement->fetchAll();

 $total_row = $statement->rowCount();

 $output = array();
 if($total_row > 0)
 {
  foreach($result as $row)
  {
   $temp_array = array();
   $temp_array['value'] = $row['student_name'];
   $temp_array['label'] = '<img src="images/'.$row['image'].'" width="70" />&nbsp;&nbsp;&nbsp;'.$row['student_name'].'';
   $output[] = $temp_array;
  }
 }
 else
 {
  $output['value'] = '';
  $output['label'] = 'No Record Found';
 }

 echo json_encode($output);
}

?>


How to Get Sum of Column in Datatable using PHP with Ajax

How to Get Sum of Column in Datatable using PHP with Ajax

Hello, if you used the jQuery Datatable plug-in to display your dynamic data in tabular form on the website, you must display the entire column in the Datatable footer. Then at this point you have the question of how to get SUM or the whole column in Datatable with server-side processing using PHP and Ajax script. In this publication you will find the server-side processing solution Datatable, with which you can call up the sum or the sum of the column data and display it on the website with PHP Ajax and jQuery. You can do this in client-side processing using various callback functions that were used to manipulate Datatable's header data. If you use this type of callback function, you have to make several changes to see the dynamic total of the column.

Here, however, we use Datatable server-side processing to determine the sum or total of the column. For server-side data processing, we calculate the column total in the server-side PHP script and, when using jQuery and the Ajax request, we display the total or total of the columns in the datable footer. The content of the header was displayed in the datatable tag. The tag was used to display the data obtained from the Ajax request in json format and to display the content of the DataTable footer. Here we have the tag of use. This tag was used to display the content of the footer. Then we also show the total or the total of the column that is displayed under the name. Below is the source code of the sum of the columns in DataTable that use server-side processing with PHP Ajax and jQuery.


index.php


This is the main file of this tutorial. In this file we used the jquery Javascript library, the bootstrap library and the jQuery DataTable library. Below this page we have created in the table with id = "order_data". We will initialize jQuery Datatable in the table with the ID attribute value. To display the sum or sum of the column in the column of the footer table, and in this column we have defined an id = "total_order". The sum or total of the column in this column is displayed with the jQuery code.

This file also contains the JQuery code for initializing the JQuery DataTable plug-in. In the JQuery code you see to get dynamic data, we used the Ajax request that was sent to the fetch.php file. To display the total or total of the column, we used the drawCallback function. This function received data from the Ajax request, which we can access via the variable json. Below is the source code of this file.


<html>
 <head>
  <title>How to Get Sum of Column in Datatable using PHP with Ajax</title>
  <script src="https://ajax.googleapis.com/ajax/libs/jquery/2.2.0/jquery.min.js"></script>
  <link rel="stylesheet" href="https://maxcdn.bootstrapcdn.com/bootstrap/3.3.6/css/bootstrap.min.css" />
  <script src="https://cdn.datatables.net/1.10.12/js/jquery.dataTables.min.js"></script>
  <script src="https://cdn.datatables.net/1.10.12/js/dataTables.bootstrap.min.js"></script>  
  <link rel="stylesheet" href="https://cdn.datatables.net/1.10.12/css/dataTables.bootstrap.min.css" />
  <script src="https://maxcdn.bootstrapcdn.com/bootstrap/3.3.6/js/bootstrap.min.js"></script>
 </head>
 <body>
  <div class="container box">
   <h3 align="center">How to Get Sum of Column in Datatable using PHP with Ajax</h3>
   <br />
   <div class="table-responsive">
    <table id="order_data" class="table table-bordered table-striped">
     <thead>
      <tr>
       <th>Customer Name</th>
       <th>Order Item</th>
       <th>Order Date</th>
       <th>Order Value</th>
      </tr>
     </thead>
     <tbody></tbody>
     <tfoot>
      <tr>
       <th colspan="3">Total</th>
       <th id="total_order"></th>
      </tr>
     </tfoot>
    </table>
    <br />
    <br />
    <br />
   </div>
  </div>
 </body>
</html>

<script type="text/javascript" language="javascript" >
 $(document).ready(function(){
  
   var dataTable = $('#order_data').DataTable({
    "processing" : true,
    "serverSide" : true,
    "order" : [],
    "ajax" : {
     url:"fetch.php",
     type:"POST"
    },
    drawCallback:function(settings)
    {
     $('#total_order').html(settings.json.total);
    }
   });


 });
 
</script>


fetch.php


This file received a request from Ajax to get data from the job table. In this file we first have to establish the database connection. After establishing the connection to the database, we defined the column to be sorted in the table. Below this file, we performed a query on selected data to retrieve data from the mysql table. Here we have to split the selection into two parts, the first part of the query is to adjust the number of rows and the full query is used to get filter data from the MySQL database. Here we also calculated the total column data of the order_value table. To send all of the column data to the Ajax request, here we added the master key in the array that was sent to the Ajax request using the json_encode () function in json data. Below is the source code of this file.


<?php

//fetch.php

$connect = new PDO("mysql:host=localhost;dbname=testing", "root", "");

$column = array('order_customer_name', 'order_item', 'order_date', 'order_value');

$query = '
SELECT * FROM tbl_order 
WHERE order_customer_name LIKE "%'.$_POST["search"]["value"].'%" 
OR order_item LIKE "%'.$_POST["search"]["value"].'%" 
OR order_date LIKE "%'.$_POST["search"]["value"].'%" 
OR order_value LIKE "%'.$_POST["search"]["value"].'%" 

';

if(isset($_POST["order"]))
{
 $query .= 'ORDER BY '.$column[$_POST['order']['0']['column']].' '.$_POST['order']['0']['dir'].' ';
}
else
{
 $query .= 'ORDER BY order_id DESC ';
}

$query1 = '';

if($_POST["length"] != -1)
{
 $query1 = 'LIMIT ' . $_POST['start'] . ', ' . $_POST['length'];
}

$statement = $connect->prepare($query);

$statement->execute();

$number_filter_row = $statement->rowCount();

$statement = $connect->prepare($query . $query1);

$statement->execute();

$result = $statement->fetchAll();

$data = array();

$total_order = 0;

foreach($result as $row)
{
 $sub_array = array();
 $sub_array[] = $row["order_customer_name"];
 $sub_array[] = $row["order_item"];
 $sub_array[] = $row["order_date"];
 $sub_array[] = $row["order_value"];

 $total_order = $total_order + floatval($row["order_value"]);
 $data[] = $sub_array;
}

function count_all_data($connect)
{
 $query = "SELECT * FROM tbl_order";
 $statement = $connect->prepare($query);
 $statement->execute();
 return $statement->rowCount();
}

$output = array(
 'draw'    => intval($_POST["draw"]),
 'recordsTotal'  => count_all_data($connect),
 'recordsFiltered' => $number_filter_row,
 'data'    => $data,
 'total'    => number_format($total_order, 2)
);

echo json_encode($output);


?>


This is another publication in DataTable. Here we have explained how the total or total of the column is displayed in the DataTable footer by processing the server side with PHP Script, Ajax and jQuery.

How to Export Data to CSV File With Date Filter Using PHP & MySQL

How to Export Data to CSV File With Date Filter Using PHP & MySQL

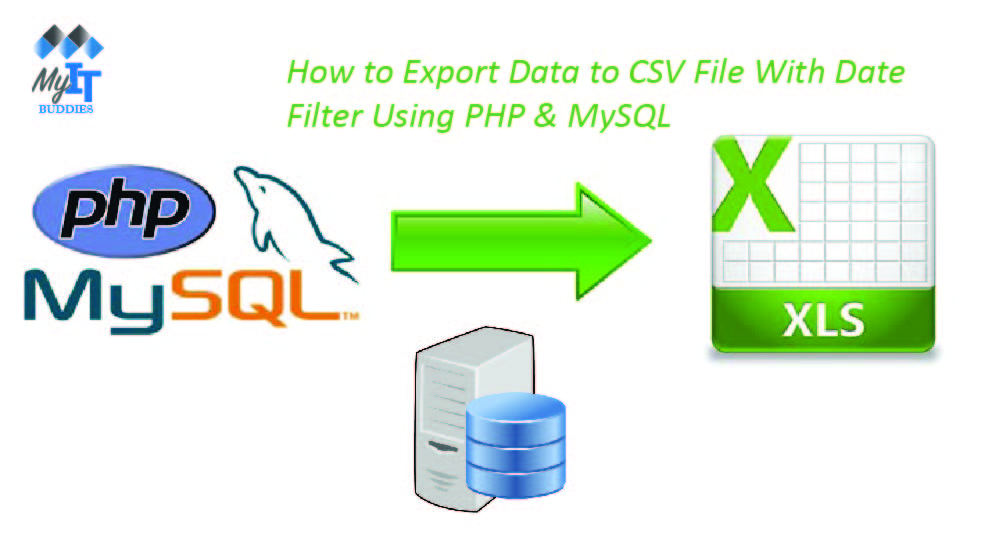
This is another contribution to exporting MySQL data. In this post, you will learn how to export MySQL data to a CSV file using a PHP script. But here we add features like the date range, which means that only the mysql data that lies between two defined dates is exported to the CSV file format using a PHP script. Learn how to export MySQL data for a specific date in an Excel worksheet or CSV file format using PHP.

If you've already learned how to export data to a CSV file or Excel spreadsheet using a PHP script. Suppose we don't want to export complete MySQL data to a CSV file or Excel spreadsheet, but we want to export this data to a CSV file using PHP that falls within the selected date range. This section shows you how to export MySQL data to a CSV file or Excel spreadsheet using the PHP script date range filter. This feature increases the usability of your web application and allows you to freely export the data you want to export, and does not export unwanted integer data. This feature reduces the bandwidth of your website and the load on your MySQL database, since only the required or filtered data has been exported to a CSV file or an Excel spreadsheet.

In this release, we want to export date range filter data to a CSV file using PHP. In PHP, many PHP compilation functions are then available in the file system to export data to a CSV file. Here we used some PHP functions like fopen (), fputcsv (), fclose () to export data to a CSV file. Here the function fopen () opens the file in PHP order. After this function, fputcsv () writes data to the open file and the fclose () function closes the opened file. Therefore, this basic PHP function was used to export data to a CSV file in PHP. But here we not only export MySQL data to a CSV file, we also export filtered exported data to a CSV file. A date range is used for the filter data, ie only two dates are defined and only the dates that were inserted between these two defined dates are exported. We can do this in the MySQL query found below. We used the start date selection plug-in to select the date range. In this simple tutorial, you will learn how to use the date range filter to export data to a CSV file in PHP. You can also find the full source code below.

Source Code


Database (tbl_order)


DROP TABLE IF EXISTS `tbl_order`;

CREATE TABLE `tbl_order` (
  `order_id` int(11) NOT NULL AUTO_INCREMENT,
  `order_customer_name` varchar(255) NOT NULL,
  `order_item` varchar(255) NOT NULL,
  `order_value` double(12,2) NOT NULL,
  `order_date` date NOT NULL,
  PRIMARY KEY (`order_id`)
) ENGINE=MyISAM AUTO_INCREMENT=21 DEFAULT CHARSET=latin1;

/*Data for the table `tbl_order` */

insert  into `tbl_order`(`order_id`,`order_customer_name`,`order_item`,`order_value`,`order_date`) values 
(1,'David E. Gary','Shuttering Plywood',1500.00,'2019-06-14'),
(2,'Eddie M. Douglas','Aluminium Heavy Windows',2000.00,'2019-06-08'),
(3,'Oscar D. Scoggins','Plaster Of Paris',150.00,'2019-05-29'),
(4,'Clara C. Kulik','Spin Driller Machine',350.00,'2019-05-30'),
(5,'Christopher M. Victory','Shopping Trolley',100.00,'2019-06-01'),
(6,'Jessica G. Fischer','CCTV Camera',800.00,'2019-06-02'),
(7,'Roger R. White','Truck Tires',2000.00,'2019-05-28'),
(8,'Susan C. Richardson','Glass Block',200.00,'2019-06-04'),
(9,'David C. Jury','Casing Pipes',500.00,'2019-05-27'),
(10,'Lori C. Skinner','Glass PVC Rubber',1800.00,'2019-05-30'),
(11,'Shawn S. Derosa','Sony HTXT1 2.1-Channel TV',180.00,'2019-06-03'),
(12,'Karen A. McGee','Over-the-Ear Stereo Headphones ',25.00,'2019-06-01'),
(13,'Kristine B. McGraw','Tristar 10\" Round Copper Chef Pan with Glass Lid',20.00,'2019-05-30'),
(14,'Gary M. Porter','ROBO 3D R1 Plus 3D Printer',600.00,'2019-06-02'),
(15,'Sarah D. Hunter','Westinghouse Select Kitchen Appliances',35.00,'2019-05-29'),
(16,'Diane J. Thomas','SanDisk Ultra 32GB microSDHC',12.00,'2019-06-05'),
(17,'Helena J. Quillen','TaoTronics Dimmable Outdoor String Lights',16.00,'2019-06-04'),
(18,'Arlette G. Nathan','TaoTronics Bluetooth in-Ear Headphones',25.00,'2019-06-03'),
(19,'Ronald S. Vallejo','Scotchgard Fabric Protector, 10-Ounce, 2-Pack',20.00,'2019-06-03'),
(20,'Felicia L. Sorensen','Anker 24W Dual USB Wall Charger with Foldable Plug',12.00,'2019-06-04');


index.php


<?php

$connect = new PDO("mysql:host=localhost;dbname=testing", "root", "");

$start_date_error = '';
$end_date_error = '';

if(isset($_POST["export"]))
{
 if(empty($_POST["start_date"]))
 {
  $start_date_error = '<label class="text-danger">Start Date is required</label>';
 }
 else if(empty($_POST["end_date"]))
 {
  $end_date_error = '<label class="text-danger">End Date is required</label>';
 }
 else
 {
  $file_name = 'Order Data.csv';
  header("Content-Description: File Transfer");
  header("Content-Disposition: attachment; filename=$file_name");
  header("Content-Type: application/csv;");

  $file = fopen('php://output', 'w');

  $header = array("Order ID", "Customer Name", "Item Name", "Order Value", "Order Date");

  fputcsv($file, $header);

  $query = "
  SELECT * FROM tbl_order 
  WHERE order_date >= '".$_POST["start_date"]."' 
  AND order_date <= '".$_POST["end_date"]."' 
  ORDER BY order_date DESC
  ";
  $statement = $connect->prepare($query);
  $statement->execute();
  $result = $statement->fetchAll();
  foreach($result as $row)
  {
   $data = array();
   $data[] = $row["order_id"];
   $data[] = $row["order_customer_name"];
   $data[] = $row["order_item"];
   $data[] = $row["order_value"];
   $data[] = $row["order_date"];
   fputcsv($file, $data);
  }
  fclose($file);
  exit;
 }
}

$query = "
SELECT * FROM tbl_order 
ORDER BY order_date DESC;
";

$statement = $connect->prepare($query);
$statement->execute();
$result = $statement->fetchAll();

?>

<html>
 <head>
  <title>How to Export Data to CSV File With Date Filter Using PHP & MySQL</title>
  <script src="https://code.jquery.com/jquery-1.12.4.js"></script>
  <link rel="stylesheet" href="https://maxcdn.bootstrapcdn.com/bootstrap/3.3.7/css/bootstrap.min.css" />
  <link rel="stylesheet" href="https://cdnjs.cloudflare.com/ajax/libs/bootstrap-datepicker/1.6.4/css/bootstrap-datepicker.css" />
  <script src="https://cdnjs.cloudflare.com/ajax/libs/bootstrap-datepicker/1.6.4/js/bootstrap-datepicker.js"></script>
 </head>
 <body>
  <div class="container box">
   <h1 align="center">How to Export Data to CSV File With Date Filter Using PHP & MySQL</h1>
   <br />
   <div class="table-responsive">
    <br />
    <div class="row">
     <form method="post">
      <div class="input-daterange">
       <div class="col-md-4">
        <input type="text" name="start_date" class="form-control" readonly />
        <?php echo $start_date_error; ?>
       </div>
       <div class="col-md-4">
        <input type="text" name="end_date" class="form-control" readonly />
        <?php echo $end_date_error; ?>
       </div>
      </div>
      <div class="col-md-2">
       <input type="submit" name="export" value="Export" class="btn btn-info" />
      </div>
     </form>
    </div>
    <br />
    <table class="table table-bordered table-striped">
     <thead>
      <tr>
       <th>Order ID</th>
       <th>Customer Name</th>
       <th>Item</th>
       <th>Value</th>
       <th>Order Date</th>
      </tr>
     </thead>
     <tbody>
      <?php
      foreach($result as $row)
      {
       echo '
       <tr>
        <td>'.$row["order_id"].'</td>
        <td>'.$row["order_customer_name"].'</td>
        <td>'.$row["order_item"].'</td>
        <td>$'.$row["order_value"].'</td>
        <td>'.$row["order_date"].'</td>
       </tr>
       ';
      }
      ?>
     </tbody>
    </table>
    <br />
    <br />
   </div>
  </div>
 </body>
</html>

<script>

$(document).ready(function(){
 $('.input-daterange').datepicker({
  todayBtn:'linked',
  format: "yyyy-mm-dd",
  autoclose: true
 });
});

</script>


How to Insert Multiple Values From Multiple TextArea Field into Mysql in PHP

How to Insert Multiple Values From Multiple TextArea Field into Mysql in PHP

If you want to learn how we can insert multiple records into the MySQL database using the Single TextArea field with PHP script. Or second, how to insert multiple data from the textarea field into the mysql table in a PHP script. We have already noticed that in PHP, unique data is inserted into the database using different HTML fields. However, it was explained for the first time how PHP can insert multiple data from the text area into the database. In this tutorial you can learn two things from this post. On the one hand, you can learn how to insert multiple rows of TextArea into MySQL using PHP, and on the other hand, you can use PHP PDO to insert multiple data into the MySQL table.

To learn this topic here, we have an example of inserting multiple email addresses into the MySQL database using the text box with PHP script. There were many different events when we wanted to insert bulk emails into the database. Therefore, it takes a long time at this point to insert one email after the other to insert data into the database. However, if you used the text box, you can enter multiple email addresses at the same time.

Now the question arises how multiple data can be inserted with the text field in PHP in mysql. This happens when you have entered several email addresses in one line and then in the text field. The following PHP script converts the email line by line into an array. The PHP script then runs a data insert query to insert multiple data by executing a single query to insert mysql. This query inserts multiple data into the execution of a single query. In this script, we use the main PHP function as explode () and array_unique (). This exploit () function converts the value of the text area field to an array using the string delimiter "\ r \ n", and the array_unique () function removes the duplicate email from the array. For this reason, this script will help you learn PHP to insert multiple records into MySQL using the TextArea field. Below you will find the complete source code and the online demo.


Source Code

Database


CREATE TABLE `tbl_email_list` (
  `email_list_id` int(11) NOT NULL AUTO_INCREMENT,
  `email_address` varchar(250) DEFAULT NULL,
  PRIMARY KEY (`email_list_id`)
) ENGINE=InnoDB AUTO_INCREMENT=1 DEFAULT CHARSET=latin1;


index.php


<?php

//index.php

$error = '';
$output = '';

$connect = new PDO("mysql:host=localhost;dbname=testing", "root", "");

if(isset($_POST["add"]))
{
    if(empty($_POST["email_address"]))
    {
        $error = '<label class="text-danger">Email Address List is required</label>';
    }
    else
    {
        $array = explode("\r\n", $_POST["email_address"]);

        $email_array = array_unique($array);

        $query = "
        INSERT INTO tbl_email_list 
        (email_address) 
        VALUES ('".implode("'),('", $email_array)."')
        ";

        $statement = $connect->prepare($query);

        $statement->execute();

        $error = '<label class="text-success">Data Inserted Successfully</label>';
    }
}

$query = "
SELECT * FROM tbl_email_list 
ORDER BY email_list_id DESC
";

$statement = $connect->prepare($query);

$statement->execute();

if($statement->rowCount() > 0)
{
    $result = $statement->fetchAll();
    foreach($result as $row)
    {
        $output .= '
        <tr>
            <td>'.$row["email_address"].'</td>
        </tr>
        ';
    }
}
else
{
    $output .= '
        <tr>
            <td>No Data Found</td>
        </tr>
    ';
}

?>

<html>
    <head>
        <title>How to Insert Multiple Values From Multiple TextArea Field into Mysql in PHP</title>  
        <script src="https://ajax.googleapis.com/ajax/libs/jquery/2.2.0/jquery.min.js"></script>  
        <link rel="stylesheet" href="https://maxcdn.bootstrapcdn.com/bootstrap/3.3.6/css/bootstrap.min.css" />  
        <script src="https://maxcdn.bootstrapcdn.com/bootstrap/3.3.6/js/bootstrap.min.js"></script>
    </head>  
    <body>
        <div class="container">    
            <div class="row content">
                <div class="col-sm-2">
                    &nbsp;
                </div>
                <div class="col-sm-8 text-left">
                    <br />
                    <h3 align="center">How to Insert Multiple Values From Multiple TextArea Field into Mysql in PHP</h3>
                    <br />
                    <div align="center"><?php echo $error; ?></div>
                    <form method="post">
                        <div class="row">
                            <label class="col-md-3 text-right">Enter Email List</label>
                            <div class="col-md-9">
                                 <textarea name="email_address" class="form-control" rows="10"></textarea>
                            </div>
                        </div>
                        <br />
                        <div align="center">
                            <input type="submit" name="add" class="btn btn-primary" value="Add" />
                        </div>
                    </form>
                    <br />
                    <h3 align="center">Email List</h3>
                    <br />
                    <table class="table table-striped table-bordered">
                        <tr>
                            <td>Email Address</td>
                        </tr>
                        <?php
                        echo $output;
                        ?>
                    </table>
                </div>
                <div class="col-sm-2">
                    &nbsp;
                </div>
            </div>
        </div>
    </body>  
</html>